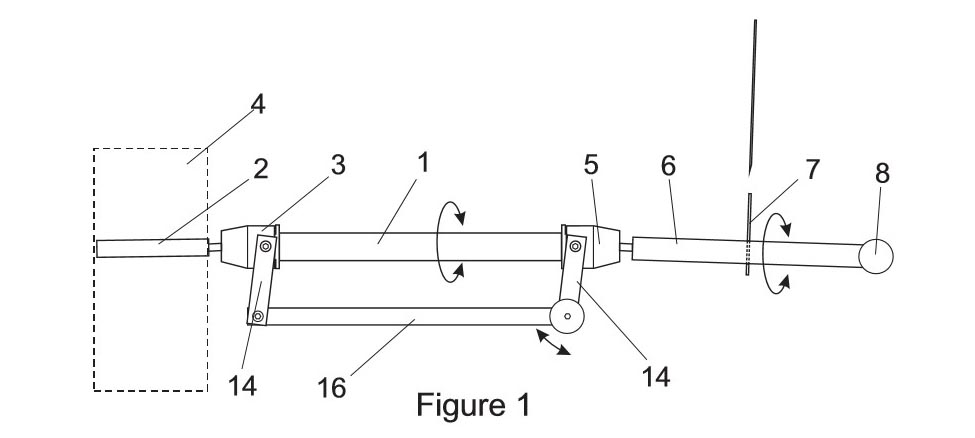
The Locator refines the “bullseye” technique of renal collecting system puncture during PCNL (percutaneous nephrolithotomy – minimal access surgery for kidney stones). It achieves this by stabilising the puncture needle.
Rationale for device
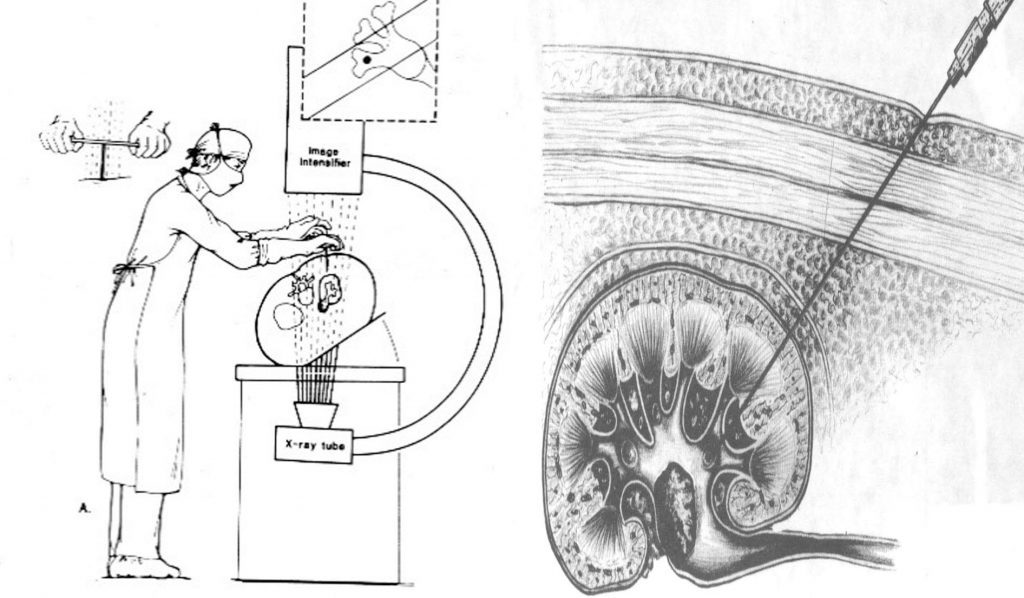
Only 27% of American urologists trained in PCNL continue to perform it and only 11% of American urologists performing PCNL obtain percutaneous access themselves.1,2 These figures point to the fact that PCNL puncture is an advanced procedure only performed by experienced endourologists. C-arm fluoroscopy is the commonest method used to achieve successful puncture.2
A device that could make the puncture quicker and more accurate would assist the urology community. The Locator attempts to do this.
Device description
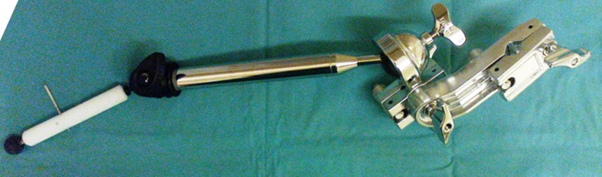
The Locator is a simple, cheap, and novel assistant to achieving successful PCNL puncture. It achieves this by stabilizing the needle during puncture. In vitro testing suggests that the device reduces fluoroscopy exposure and makes the puncture quicker.3
Patent
Video description of Locator puncture technique
Steps for PCNL while using The Locator
1) A Cook “UPJ balloon catheter” is sited. An open-ended ureteric catheter can also be used. This is connected to an extension set to allow the surgeon to instil contrast intra-op. A catheter is sited.
2) Patient is turned prone and pillows placed under abdomen to flex patient.
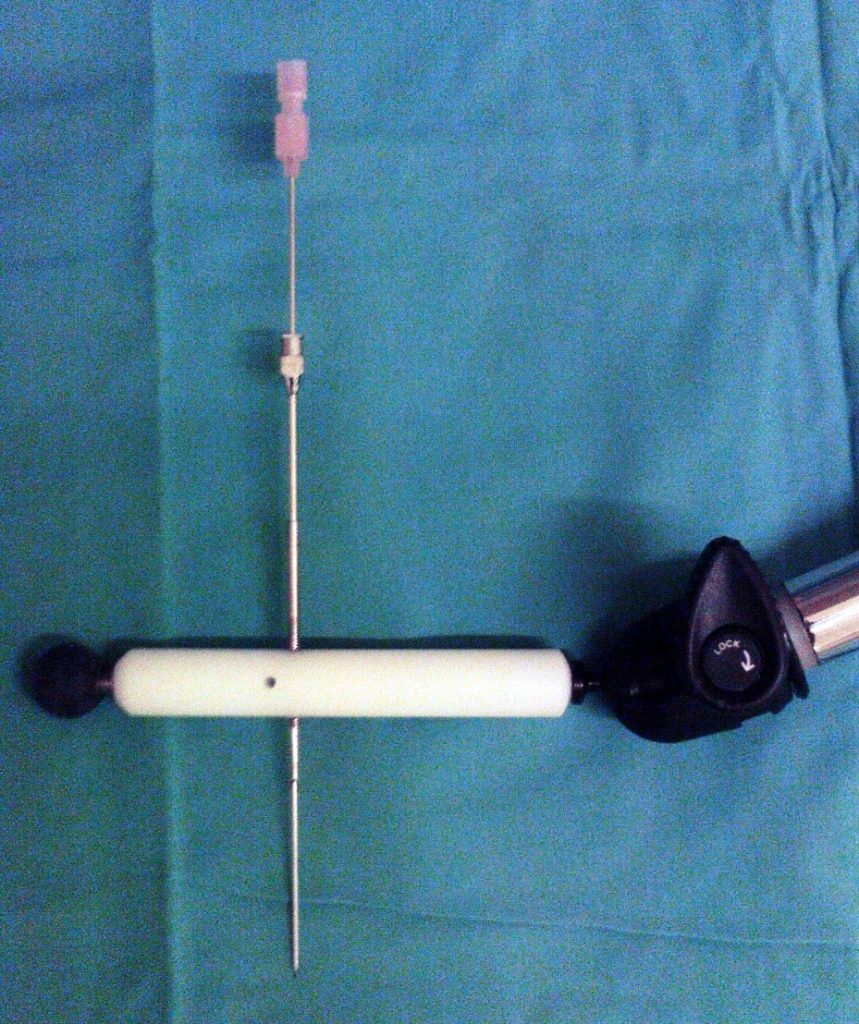
3) Anaesthetic screen is placed, and Locator is attached to it. Locator is then prepped with alcohol.
4) 5-10ml air is injected with contrast to attempt to identify the posterior calyxes
5) With C-Arm at 30 degrees to the surgeon. Coning of the screened area is done to allow the surgeon’s hands to be out of the X-ray field.
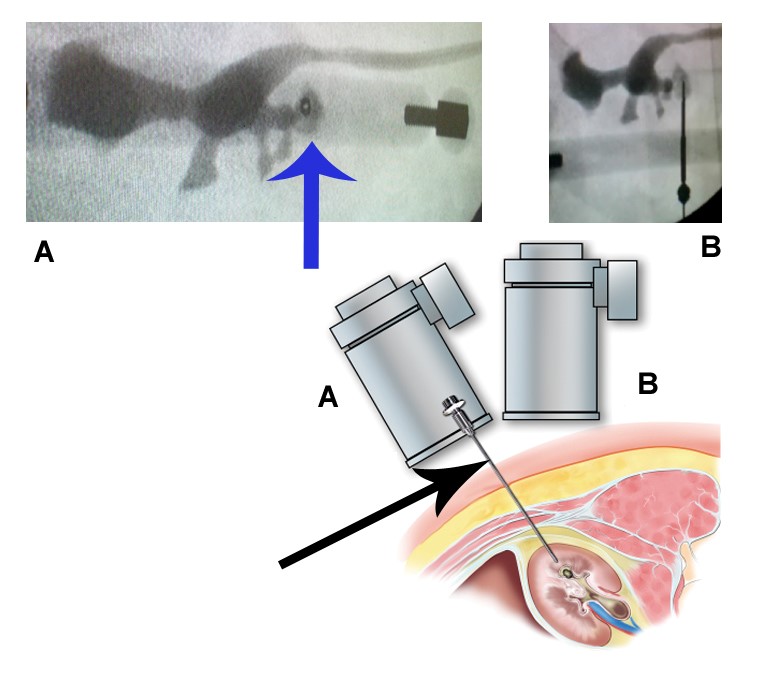
6) The bull’s eye is obtained over the desired Calyx with the metal guide of the Locator.
7) An assistant locks up the Locator.
8) A generous incision is made in the skin.
9) Through the metal guide with the bull’s eye, the 14-gauge steel needle is used to puncture the lumbodorsal fascia roughly up to renal capsule.
10) The C-Arm is placed at 90 degrees and depth of puncture is assessed.
11) Using the Cook “Two Part” needle the calyx is punctured, a 2ml syringe is used to aspirate contrast.
12) A stiff guide wire is sited. I have found the Cook “Hi-Wire” to be superior in terms of Kink resistance. Beware: it is very slippery and is easily dislodged.
13) The Locator and needles are removed.
14) Routine dilatation can now be performed using balloon, Amplatz or telescopic dilators.
Supporting literature
References
- Lee CL, Residency training in percutaneous renal access: does it affect urological practice? J Urol. 2004;171:592
- Bird VG. Practice patterns in the treatment of large renal stones, J Endourol 17 (2003) 352
- Lazarus, J., & Williams, J. (2011). The Locator: Novel Percutaneous Nephrolithotomy Apparatus to Aid Collecting System Puncture—A Preliminary Report. Journal of Endourology, 25(5), 747–750. doi:10.1089/end.2010.0494